If you are sure that your CMOS battery is good, but the setting are always reset to default after shutdown,
try this;
After shutdown yor computer,
1.remove your battery from the socket.
2. you will see the negative contact point
3. clean the contact point with contact cleaner or very fine amery paper to get shining
4. If you are using amery paper be sure that remove particles are wiped away from the motherboard surface.
5. To get proper contact with the battery slightly bend the contact plate upward with a suitable tool.
6. Repeat the step 3 to the positive contact point also.
7. Replace the battery and start the computer.
8. change your settings of SETUP eg. Time and Date and save.
Im sure this will be the last change........
Saturday, November 6, 2010
Wednesday, November 3, 2010
Windows 7 shortcuts
Windows 7 boasts a lot of great new shortcuts, but I'm focusing on several of my favorites. Check out the video above for a closer look. For those of you who prefer text to video, here are all of the shortcuts I highlighted:
- Win+Home: Clear all but the active window
- Win+Space: All windows become transparent so you can see through to the desktop
- Win+Up arrow: Maximize the active window
- Win+Down arrow: Minimize the window/Restore the window if it's maximized
- Win+Left/Right arrows: Dock the window to each side of the monitor (If you've got dual monitors, adding Shift to the mix (e.g., Win+Shift+Right arrow) will move the window to the adjacent monitor.)
- Win+T: Focus and scroll through items on the taskbar.
- Win+P: Adjust presentation settings for your display
- Win+(+/-): Zoom in/out
- Shift+Click a taskbar item: Open a new instance of that application
Tuesday, November 2, 2010
How to Activate your Windows 7
Description
After you have completed the installation of windows 7, Disconnect the internet connections and simply extract the zip file to run the activator. Select your version of win7 and let it to complete.
Rightclick computer then click properties and check the windows activation status.
Waruna
Download here:
http://www.sendspace.com/file/qz3zmg
Monday, November 1, 2010
What is Windows Aero?
What is Windows Aero?
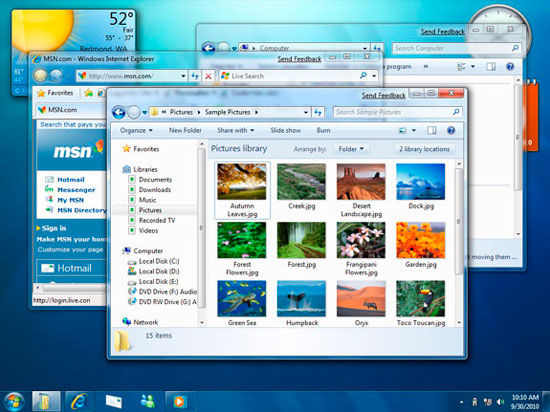
Windows Aero is the premium visual experience of Windows Vista. It features a translucent glass design with subtle window animations and new window colors.
 Windows Aero features glass-like windows for an open look
Aero’s distinctive visual style combines the appearance of lightweight, translucent windows with powerful graphic advances. With Aero, you can enjoy visually appealing effects and appearance and also benefit from better access to your programs.
Glass effects
 Translucent glass windows create depth on the desktop
One of Aero’s more visually obvious features is glass window borders, which let you focus on the contents of your open windows. Window behavior has also been redesigned, with subtle animations accompanying the minimizing, maximizing, and repositioning of windows to appear more smooth and effortless.
 Tint your windows using the provided colors, or mix your own custom color
You can even fine-tune the color and appearance of windows, the Start menu, and the taskbar by tinting your translucent windows. Select one of the provided colors, or create your own custom color using the color mixer.
Switching between programs
 Windows Flip 3D
Part of the Windows Aero experience is Windows Flip 3D, which is a way to arrange your open windows in a three-dimensional stack that you can quickly flip through without having to click the taskbar.
 Pointing to a window's taskbar button displays a preview of the window
Aero also includes taskbar previews for your open windows. When you point to a taskbar button, you'll see a thumbnail-sized preview of the window, whether the content of the window is a document, a photo, or even a running video.
 Switching windows with ALT+TAB
Even the method of pressing ALT+TAB for switching windows has been giving an update. Instead of simple icons, you can see live previews of the windows for each open program.
How do I get Windows Aero?
The following editions of Windows Vista include Aero:
- Windows Vista Business
- Windows Vista Enterprise
- Windows Vista Home Premium
- Windows Vista Ultimate
Aero is not included in Windows Vista Home Basic. You can find out which edition of Windows Vista you have on your computer by opening Welcome Center.
Open Welcome Center by clicking the Start button  , clicking Control Panel, clicking System and Maintenance, and then clicking Welcome Center.
The edition of Windows Vista you're running is displayed with your computer details near the top of the window.
For more information about the hardware and settings you need to run Windows Aero, see Troubleshoot problems with Windows Aero.
Speed up your Windows 7
Want to speed up your new Windows operating system? Check out our tips on how to speed up Windows 7.
Microsoft’s new operating system (OS) has been getting rave reviews since it was in the infancy of its beta form. If you’re loving your new Windows 7 OS but wish it was just a little bit speedier, you’re in luck. Here are some tips to speed up this already light and speedy new OS.
Meet the Minimum. First things first, make sure you’re meeting the minimum hardware requirements to run Windows 7. You should have at least 1GHz processor (32 or 64-bit), 1GB of main memory, 16GB available disk space, support for the Aero interface (DX9 graphics support with 128MB of memory), and a DVD-R/W drive.
Cut Unwanted Programs. Cutting down on the amount of programs running is always a good idea. To figure out and cut down on programs running in the background you can use msconfig or just install software that will identify those programs secretly running. Some programs will open automatically, so try this:
- Go to Start and enter ‘msconfig’
- Click on the startup tab and uncheck anything you don’t need
Disable Min-Max Animation. By disabling the Minimize-Maximize animation you’ll speed up your window switching and make your Windows 7 PC run faster. To disable:
- Go to Start and type in ‘SystemPropertiesPerformance‘
- Go the Visual Effects tab
- Uncheck ‘Animate windows when minimizing and maximizing‘ and click OK
Forget the Fonts. Removing unwanted fonts—especially TrueType fonts—will also speed up Windows 7. Keep the ones you need and use, and then remove the rest—but put those unwanted fonts in a temporary directory just in case you want them some day. To do this:
- Open Control Panel
- Open Fonts folder
- Move fonts temporary space
Turn Off System Sounds. This is a basic for speeding things up—and it will definitely free up some resources. To do this:
- Go To Start and type in mmsys.cpl
- Click on the Sounds tab and choose ‘No Sounds‘ in the sound scheme drop down
Disable Aero. If you really need the extra speed then yes, you can disable Windows 7 Aero. To do this:
- Right-click on your desktop and select ‘Personalize‘ and click the ‘Window Color‘ tab
- Uncheck the ‘Enable Transparency’ box
- Click on ‘Open classic appearance properties for more color options’
- Choose a Standard or Basic theme from the popup that appears
Friday, October 29, 2010
General System Requirements Nero 9
General System Requirements Nero 9
Optional Requirements
Special Requirements for Home Entertainment
Nero Show Time
Special Requirements for video editing and authoring with Nero Vision
Special Requirements for LightScribe and Labelflash
Special Requirements for working with high definition content with Nero Vision
For playback of unprotected high definition content, like AVCHD, additionally
One of the following processors:
A graphics card with at least 256MB of video RAM based on one of the following:
For playback of protected high definition content (home recorded BD-AV or AVCREC discs), additionally:
- A DVD-ROM drive is required for installation
- Windows® XP SP2 or SP3, Windows Vista®, Windows Vista® with SP1 or SP2, Windows® 7, Windows® XP Media Center Edition 2005 SP2
- Windows® XP and Windows Vista® 64 bit versions are supported in 32 bit emulation mode.
- Nero DiscCopy Gadget only works in 32 bit emulation mode in the Sidebar under Windows Vista® 64 bit, or in the Desktop Gadget under Windows® 7 64 bit. Please follow these steps to activate.
- Windows® Internet Explorer® 6.0 or higher
- 1 GHz Intel® Pentium® III or equivalent AMD and Intel® processor (2 GHz Intel® Pentium® 4 or equivalent AMD and Intel® processor for Windows Vista®, or Windows® 7), 256 MB RAM (512 MB RAM for Windows Vista®, or Windows® 7)
- 1.8 GB hard drive space for a typical installation of all components
- CD, DVD, or Blu-ray Disc recordable or rewritable drive for burning
- DirectX® 9.0c revision 30 (August 2006) or higher
- Up to 9 GB available hard drive space for DVD images and temporary DVD files
- Graphics card with at least 32 MB video memory and minimum resolution of 800 x 600 pixels and 16-bit color settings (24-bit or 32-bit true color is recommended)
- Installation of the latest WHQL certified device drivers is strongly recommended
- For the Nero Online services: Nero product registration, product updates, patent activation, Gracenote® services, Nero Online Backup, and other features (such as photo sharing) an Internet connection is required.
- Nero recommends a broadband connection (DSL-1000 and higher or Internet connection with equivalent performance) for all Nero online services such as Nero Online Backup and Nero Video Services. Internet connection charges are the user's responsibility
Optional Requirements
- 16-bit Microsoft® Windows® compatible sound device and speakers (16 bit sound device required for Nero Wave Editor and Nero SoundTrax)
- Installation of latest WHQL certified device drivers recommended
- Blue laser reading/writing device for Blu-ray Disc support* (check special blue laser system requirements)
- Up to 50 GB free hard drive space for Blu-ray Disc BD-R/RE dual layer disc images
- SecurDisc compatible optical drive for SecurDisc features
- OHCI compliant FireWire controller (IEEE 1394) for DV or HDV capturing
Special Requirements for Home Entertainment
Nero Show Time
- Optical drive with DVD capability to play DVD-Video
- Graphics card with hardware overlay support.
- 16-bit Microsoft® Windows® compatible sound device and speakers
Special Requirements for video editing and authoring with Nero Vision
- For TV recording, DVD-Video authoring, capturing and burning in real time 2 GHz CPU and 512 MB RAM
- For analog or digital recording: TV tuner or video recording card
- OHCI compliant FireWire® card (IEEE 1394) for DV capturing
- For Smart 3D menus: DirectX® 9.0 compliant graphics card with 3D acceleration, 16 bit color, and a minimum of 64 MB video memory is required (32 bit, true color, 128 MB video RAM and support for Shader Model 3.0 is recommended)
- For High Definition Capturing and Editing: HD capable video board, FireWire® controller conforming to OHCI (IEEE 1394) for HDV recording, 2,4GHz or faster processor (HT or dual core), 1 GB of RAM or more
Special Requirements for LightScribe and Labelflash
- LightScribe compatible recorder and medium
- LightScribe host software must be installed
- Labelflash compatible recorder and medium
Special Requirements for working with high definition content with Nero Vision
- Intel Pentium IV 2 GHz or equivalent AMD and Intel processors (faster recommended)
- Blu-ray Disc drive with recording functionality for data, audio and video recording
- Minimum of 512MB RAM
For playback of unprotected high definition content, like AVCHD, additionally
One of the following processors:
- AMD Athlon 64 FX 2.6 GHz or faster
- AMD Athlon 64 X2 2.2 GHz or faster
- AMD Turion 64 X2 2 GHz or faster
- Intel Core Duo 2 GHz or faster
- Intel Core 2 Duo 1.8 GHz or faster
- Intel Pentium Extreme Edition 3.2 GHz or faster
- Intel Pentium D 3.4 GHz or faster
A graphics card with at least 256MB of video RAM based on one of the following:
- nVidia GeForce 6600GT, 7600GT, 7800GTX512, 7900GS, 7900GT, 7900GX, 7900GTX, 7950GT, 7950GTX, 8500, 8600, 8800, 8400M, 8600M or newer
- ATI X1600, X1650, X1800, X1900, X1950, Radeon HD series or newer
For playback of protected high definition content (home recorded BD-AV or AVCREC discs), additionally:
- For 64bit systems, Windows Vista or later is required
- The installed Blu-ray Disc drive must support AACS
- PCI-Express/onboard video card with built-in display (e.g. notebook or integrated PC)
- PCI-Express video card with DVI/HDMI and HDCP-support, Display/TV with HDMI input or HDCP-enabled DVI input
- PCI-Express video card with VGA output and VGA monitor (some discs may not play or play with reduced resolution on analog displays)
- PCI-Express video card with component/video output and support for CGMS-A and Macrovision, TV/projector (some discs may not play or play with reduced resolution on analog displays)
- Latest graphics drivers with COPP support (ATI Catalyst 8.1, NVIDIA ForceWare 169.21 (Windows XP), ForceWare 169.25 (Windows Vista) or newer recommended)
- To determine whether a display or TV supports HDCP, please check its documentation
- Some combinations of graphics cards, displays and discs may result in reduced resolution playback. Use of a HDCP-supporting card and display is recommended for best results
*Please note:
Blu-ray capabilities are subject to change
Blu-ray capabilities are subject to change
Thursday, October 28, 2010
Select your version of Windows 7
Select your version of Windows 7

The main purpose of this trick is not to hack copies of Windows 7, but to choose the version that will be installed legally. You must therefore have a license to activate the version you will choose.
Principle
Deleting a single file from your copy of Windows 7 will let you choose between these versions: Starter, Home Basic, Home Premium, Pro, Ultimate. This is useful especially for netbook users looking to install the Starter version from their Ultimate Version installation DVD.
Requirements
You must have the necessary equipment to implement these manipulations:
- Windows 7 installation DVD
- DVD Player/burner
- A blank DVD
- A complete computer (mouse, keyboard, screen)
- A statutory license for the version you plan to install
The steps
To get the screen that lets you choose your edition of Windows 7, follow these steps:
- Put your Windows 7 installation DVD in the drive of your computer:
- Copy the contents of your DVD to a folder on your desktop (or on a USB key, etc ...)
- Open the folder and then open the folder "Sources".
- Tap twice on 'E' on your keyboard and delete the (ei.cfg) file
- Insert blank DVD that has already been prepared
- Burn the files to your folder (select the files using CTRL + A )
- Upon launching the installation of Windows 7, using your custom DVD, you will be prompted to choose the version you wish to install.
Wednesday, October 27, 2010
PowerDirector 8 Overview
CyberLink PowerDirector 8
CyberLink PowerDirector used to be held back by a distinct lack of features compared to the Adobe and Corel/Ulead alternatives. It was fine for simple edits, but very easy to outgrow. With PowerDirector 7, however, CyberLink brought the app much closer to the competition, making it worthy of consideration. PowerDirector 8 is another huge upgrade, with both new effects capabilities and changes to the underlying engine.
However, one area which hasn't seen a massive change is the interface, at least not in appearance. The icons for the Magic functions to the left of the timeline are now coloured, but other than that things look the same. There are some new features, here, though. In particular, CyberLink has increased the number of timeline tracks still further over version 7, to 16 in total. Nine of these are for picture-in-picture video, up from the previous six. But the increase to four audio tracks is the most significant upgrade. The two audio tracks allowed by the previous version were too much of a limitation if you wanted to create a complex soundtrack involving music, voiceover and foleys at the same time.
There are more fundamental changes to the code beneath the interface, however. Two main innovations have been added to help boost productivity. The most generally useful is the new Shadow Editing system. This creates proxy files when you import high definition footage. It's an optional feature, and you're prompted to turn it on when you import the files. When enabled, Shadow Editing mirrors your HD with standard definition MPEG-2 files, which are substituted during the editing process.
CyberLink PowerDirector used to be held back by a distinct lack of features compared to the Adobe and Corel/Ulead alternatives. It was fine for simple edits, but very easy to outgrow. With PowerDirector 7, however, CyberLink brought the app much closer to the competition, making it worthy of consideration. PowerDirector 8 is another huge upgrade, with both new effects capabilities and changes to the underlying engine.
However, one area which hasn't seen a massive change is the interface, at least not in appearance. The icons for the Magic functions to the left of the timeline are now coloured, but other than that things look the same. There are some new features, here, though. In particular, CyberLink has increased the number of timeline tracks still further over version 7, to 16 in total. Nine of these are for picture-in-picture video, up from the previous six. But the increase to four audio tracks is the most significant upgrade. The two audio tracks allowed by the previous version were too much of a limitation if you wanted to create a complex soundtrack involving music, voiceover and foleys at the same time.
You can now have up to 16 tracks on the timeline, including nine for video and four for audio
There are more fundamental changes to the code beneath the interface, however. Two main innovations have been added to help boost productivity. The most generally useful is the new Shadow Editing system. This creates proxy files when you import high definition footage. It's an optional feature, and you're prompted to turn it on when you import the files. When enabled, Shadow Editing mirrors your HD with standard definition MPEG-2 files, which are substituted during the editing process.
Shadow Editing creates lower-resolution proxies for HD files to speed up editing workflow
The files are rendered in the background, and take a little while to create. But you can start editing straight away. When the Shadow Editing proxies are ready, the workflow becomes a lot smoother. Even when we layered multiple clips and added effects to each, a real-time preview remained available, albeit not without dropped frames, although the use of lower-resolution proxies was obvious. Still, editing the HD directly would have made the preview far too sluggish. The full resolution files are then used again for final rendering, so this is performed at the best possible quality.
Tuesday, October 26, 2010
No Display from AGP video card ?
If you have this problem after install your new AGP video card or shifted from Onboard VGA to a card, you might check following...
If initial on screen display appeares, go to BIOS setup and check AGP aperture size is set to the same or more than your video card memory. (ex. if your card memory is 128MB, AGP aperture size should be set to 128 or more than that).
OR
Even the initial display not comes you must connect video cable to onboard VGA and follow the procedure above.
Good Luck
Waruna...
Ink Levels Reset for HP Cartridges HP21, HP27, HP56, HP58
This reset methods be used to reset ink levels on HP printer that using cartridges HP21, HP27, HP56 and HP58 (On most models). I have tested this reset methods on HP Deskjet 2466 and work perfectly but in other HP printer types this reset methods does not work.
To do this reset methods no software resetter required, just require only a piece of tape. If this reset method does not work on your printer you will need to repeat this process. If you have to reattempt the reset turn your computer off before doing so. Leave computer off during the reset process or disconnected the printer from computer.
Here the Ink levels reset methode for HP cartridges HP21, hp27, hp56 and HP58:
- Remove cartridge from your printer.

- Place a piece of tape over the top left contact as shown in red on the picture to the right.
- With the tape covering the contact place cartridge back into printer.
- The printer will perform and alignment page. (Some newer models no longer print alignment pages. If printer runs through a series of priming routines and stops for 20 seconds continue through with next step.)
- Once an alignment page has been printed remove cartridge from printer.
- Place a piece of tape over the second contact shown in red.
- Place cartridge into printer with both pieces of tape. (One covering the first contact and one cover the second contact.)
- Printer will print another alignment page. (Some newer models no longer print alignment pages. If printer runs through a series of priming routines and stops for 20 seconds continue through with next step.)
- Once the second alignment page has been printed remove cartridge from printer.
- Remove tape pieces from cartridge contacts Make sure there is no residual adhesive on cartridge contacts.
- Place cartridge into printer. Cartridge should now read full.

Monday, October 25, 2010
What is the difference between Total Available Graphics Memory (Vista) and installed video memory?
installed video memory > the physically installed graphics
total available graphics memory > as the name says it all, it is the total graphics memory that it is able to deliver
meaning your installed video memory + shared system memory
the shared system memory is the amount of graphics it takes or steals from your main operating ram., it is dynamically alloted and depends on a quite a few considerations such as installed ram, installed operating system, required ram, required graphics memory for the application and such
Sunday, October 24, 2010
How to extend the duration of Photos in the slideshow option?.
This is the easiest method of doing this in Power Director 8.
1.Insert your fotos in to the time line. The preset time duration of a slide 5 sec appeared initially.
2.Click one of the foto in the time line. then the magic motion icon appeared on the left of the time line area.
3.Click magic motion icon and the Magic motion window opens.
4. Select any motion style and it will applied to selected foto with a fade transition. (and you can customize the motion also),
5. If u want to apply to all slides , click apply to all and you will see all the same affect is applied with fade transitions. (I suggest u to select random motion when applying to all)
6. You can adjust the slide duration individually and also select all the clips on timeline (SHIFT+Click) and adjust the duration of all.
7. You can change the transitions as well.
Subscribe to:
Posts (Atom)